
Each year, I endeavour to make a cake for my son. This is his 6th birthday and my 6th cake for him. As his age progresses, his request for his birthday cake also gets complicated. This year, he requested for a Minecraft cake. In case you are in the dark, Minecraft is actually an online game (which makes no sense to me at all).
When I first googled for information, I was apprehensive. It was complicated. I was not confident I could do it. Worse of all, it involves fondant, which I have not ventured into and have no interest in doing so. But I have to at least try. I initially planned a very simple cake with purchased figurines as topper. Unfortunately, I have forgotten to purchase the figurines and therefore, it didn't come in time. I have to use fondant to make the figurines. Even that, I chose the easiest figurines, ENDERMAN and CREEPER. I had no choice but also make STEVE as he is a trademark in Minecraft afterall.
Surprising for me, the cake was easier to do as I thought. The only hard (rather time consuming) part are the figurines which I pre-make one day in advance. For the tutorial of the figurines, I refered to some Youtube clips. You can find the tutorials here:
STEVE
CREEPER
ENDERMAN
Luckily for me, it turned out quite satisfactory.
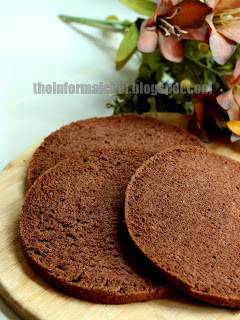
As for the cake, it was a chocolate sponge cake with two layers to whipped topping. I made the cake with a 7" cake tin so that it will resemble the land later. The cake was soft and fragrant, just as I wanted it. You can find my recipe here:
To make it look real, I covered the sides of the cake with chocolate fondant. This time, I did a rough estimate. I used 3/4 cup of cooking chocolate chips to 3/4 cup of whipped topping (as I needed to finished off the topping. I thought it was a bit runny so I put it in the fridge to cool. Turned out the consistency was what I wanted. Perfect! Of course, if you have a better ganache recipe, by all means modify. Mine was just a simple "make-with-what-is-available" estimate.
I got my grass to the perfect colour. It took a lot of green colouring. Unfortunately when it was eaten, the green was all over the mouth making everyone looked like zombie. Now, I wonder how those cakes I saw on TV with bright colours were made. Wouldn't it leave a trail of colours too? I used Americolour gel. Is there a better gel? Please share.
Making this cake was easier that I thought. I first layered my cake and then cut a square out of my square cake. I stacked it on top of the larger portion to make it double layer representing the uneven levels in Minecraft. It could be more complicated but I opted for a simple presentation. Two levels. I did a blue gel to represent the water. It was not very successful as it melted when I took the cake out. So I quickly threw it away. The grass was piped on the cake. Ganache was applied roughly at the sides. The up side about making this cake is that you don't need a clean refined finishing. The terrain is by nature rough! Yay!


So here it is, my process of making this cake. Hope you enjoyed reading it as much as I enjoyed eating it!

For my amateur and simple (done 5 years ago) Teddy Bear Cake, please click here:

This comment has been removed by a blog administrator.
ReplyDeleteAppreciating the persistence you put into your blog and the detailed information you provide. Keep up the good work.
ReplyDeletecustom packaging malaysia
butter container malaysia
christmas cookies packaging
Cool
ReplyDelete