Showing posts with label Valentine. Show all posts

Friday, 12 February 2016

Red Velvet Molten Lava Cake 心太软


What should I make for my husband on Valentine's Day? You see, we are past that lovey-dovey stage. So expressive heart shapes with mushy wordings are totally out. I am sure there are many die-hard romantic souls out there but my family is more "Chinaman" inclined. So, I have decided on a Red Velvet Molten Lava cake. The message is subtle but is by no means less influential. The colour red represents the heart whilst the oozy centre represents one's overflowing love for each other. A perfect fit don't you think?

Tuesday, 29 September 2015

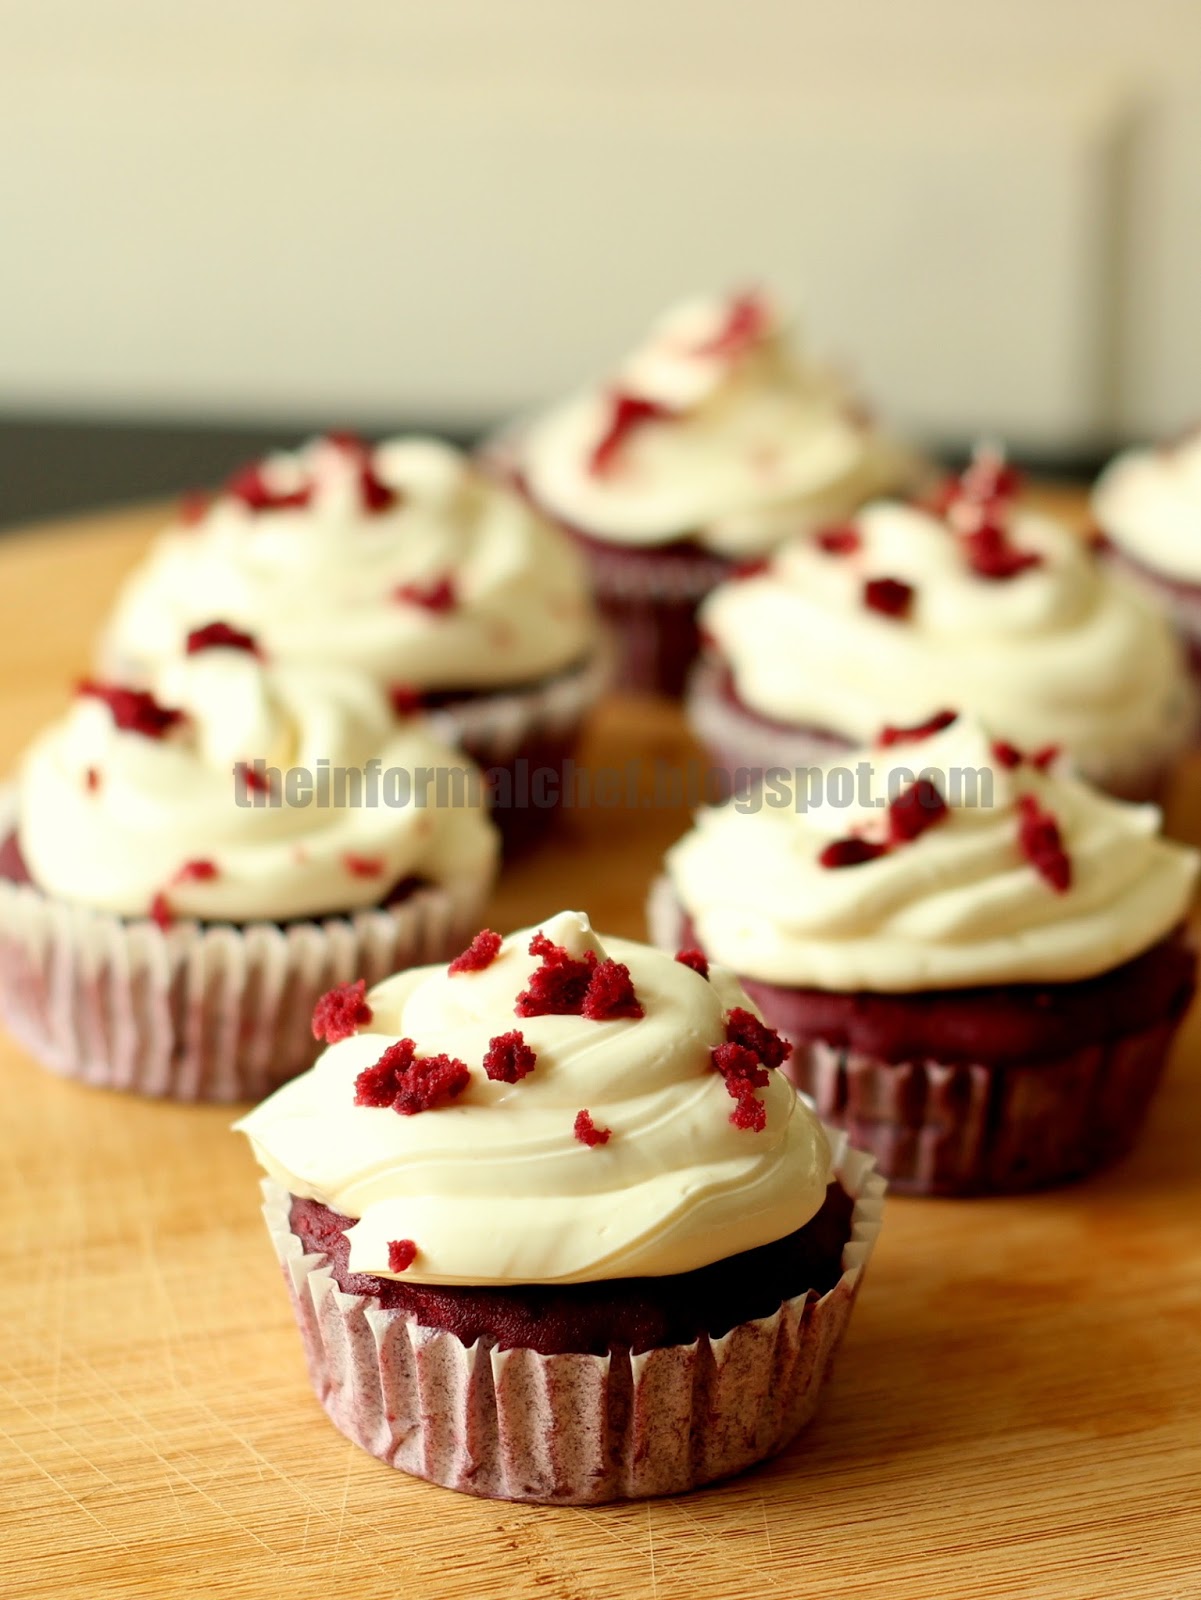
Red Velvet Cupcakes 红色天鹅绒杯形蛋糕


When I first chanced upon a red velvet cake, I did not like what I saw. The dramatic red freaked me out a little, what more when I found out it was all food colouring. I kept telling people it was just another chocolate cake that was added with red colouring for commercial purposes. Apparently, there is a difference. A chocolate cake is more rich, luscious and dense with more chocolaty flavour. Whereas, a red velvet, well, is velvety soft and very moist with just a hint of chocolate. It uses lesser butter, which I totally approve of. The star of the ingredients, buttermilk, gives the cake the moistness that is almost synonymous with a red velvet.

This cupcake recipe is an adaptation from my red velvet cake recipe. I am not into cupcakes. However, I do admit this is a convenient party munchie. As such, I bake cupcakes instead of the whole cake to gatherings. Just last Friday, I baked some red velvet cupcakes for my cell group meeting. I was, however, not very satisfied with the appearance as it has a nice beautiful dome to it. Nothing wrong with it really but I like my cupcakes flatter so that I could add on my delicious cream cheese frosting. I have since cut a little of the dome (the usual method) and apply my cream cheese frosting. But I am thirsty to find out how these people get that wonderfully raised, almost flat top.


My research came back with a few suggestions which I have since tried and tested on my red velvet cupcake recipe. There are a few suggestions here that are not uncommon so bear with me if you have already known:

1. Lower temperature
2. Reduce leavening agent
3. Bain marie method
4. Wrap a wet towel around the strip
5. Store bought cake strip

As I am perfectly satisfied with the moist, soft and fluffy texture of my cake, options 1 and 2 are out. Options 4 and 5 are meant for cakes therefore leaving me with just option 3, which is basically a water bath. And the result? Those lovely red velvet cupcakes rose to perfection! Now my red velvet cupcake recipe is complete and I could finally share this recipe with all of you.

Note:
This is just me being picky on the appearance. You could ignore the bain marie method and just apply your choice of frosting like I did the first time but it is always good to learn some new tricks that can be applied when the occasion arises. 


Red Velvet Cupcakes 红色天鹅绒杯形蛋糕
Makes 12 cupcakes

Ingredients

200 g flour
1/2 tsp baking soda
1/2 tsp baking powder
1/4 tsp salt
1 1/2 tsp dutch processed cocoa powder (I used Hershey's)
85 g butter, softened
110 g castor sugar
180 ml (3/4 cup) buttermilk (or add 3/4 tsp of vinegar to 3/4 cup of whole milk and rest for 10 mins)
1/2 tsp vinegar.
1/2 tsp vanilla extract
1/2 tbsp red colouring (I also added two drops of yellow colouring)
1 1/2 large eggs ( A grade)

Cream Cheese Frosting
recipe here


Cooking Instruction

1. Preheat oven to 170C.


2. Sift flour, baking soda, baking powder, cocoa powder and salt into a bowl.


3. Cream butter and sugar. Add eggs in two batches and then vanilla, buttermilk and vinegar. Mix until all are combined.


4. Add sifted dry ingredients in two batches into the wet mixture. Using the whisk, mix gently until well combined. Then use spatula to scrape the sides and bottom to thoroughly combine the batter.


5. Scoop batter into individual cupcake tins lined with cupcake liners. At this point, you could use a water bath like the above picture. Bake for 17 - 20 mins until skewer comes out clean when tested. Remove from oven and let cool. Pipe in cream cheese frosting.



Monday, 22 June 2015

White Chocolate Strawberry Cheesecake 白巧克力草莓芝士蛋糕


I was drooling with saliva when I stumbled upon this raspberry cheesecake the other day. I was motivated but raspberry was not something that was easily available in this part of town. Frozen raspberries were available, but at a really inflated price. Therefore, I opted to be practical and changed it to strawberry instead. I took a step further by using preserves since I have a jar left after my Neapolitan Pudding recipe. It saved so much work as I did not have to cook the sauce from scratch. I fully recommend this method unless you are adamant on authenticity.

Friday, 12 June 2015

Easy Delicious Desserts - Neapolitan Pudding 三味布丁


I had two bars of white chocolate nearing expiry and I desperately needed a recipe to finish it off. While I was researching, I was pretty attracted to this white chocolate pudding. My mind was pretty set on a white chocolate pudding when a picture of this beautiful neapolitan cheesecake caught my eyes. At that instant, I know I am going to attempt a neapolitan pudding.

Monday, 20 April 2015

Cheese Baked Stuffed Shrimps 芝士烤虾


The other day, my sister-in-law bought some very large shrimps home. The shrimps were as big as my palm (see pix). Initially it was meant to be grilled. However, I felt that just grilling these large shrimps is a bit of a waste. I suggested we do something more special to it. Then it dawned on me that I have no such recipe. At the end, I decided to do cheese baked stuffed shrimps. I have always wanted to make stuffed lobster or lobster mornay and having these large shrimps seems to make it perfect. Since lobster is almost beyond reach in this part of the world, large shrimps would just be as good.

Wednesday, 11 February 2015

Melt In Mouth Pineapple Tart - Valentine Edition


Oh my, I have been so busy cooking for Chinese New Year I have no time to concentrate on this special day we call St. Valentine's Day. I have been scratching my head on what is an appropriate gift to celebrate this day on such a short notice. Fortunately, something just struck me (and it is not the cupid's arrow. I am too old for that). I have the perfect Valentine gift - a special edition Valentine's Day pineapple tart. I am packaging my pineapple tart into lovely heart shaped cookies to represent Valentine's Day and Chinese New Year. How's that for killing two birds with one stone?


There is really no secret recipe here. All you have to do is use the same recipe for the pineapple tart. It is the moulding and packaging that changed. This post will give you a step-by-step guide to making your very own heart shaped pineapple tart. Hope you enjoy the process. Happy Valentine's Day!


Valentine's Day Melt In Mouth Pineapple Tart


Makes 42 pineapple tarts (depending on the size of the mould)

Ingredients

1 portion pastry (click here for recipe)
350 g pineapple jam (click here for recipe)
1 heart shaped mould
egg yolk for egg wash

Instruction


1. Get a reasonable sized heart-shaped mould that has a wall of about 1 cm. Fill the mould with dough. Weigh the dough to find out the quantity needed. Mine is about 20 grams, just the perfect size that I need. I allocated 9 grams of filling and 12 grams of pastry for each pineapple tart.


2. Roll the 12 grams of pastry into a ball. Flatten and put pineapple jam in the centre. Wrap dough around the pineapple jam. Make sure all the fillings are nicely wrapped up. Roll into a ball.


3. Gently fill the mould with dough. Press the dough a little to make sure all the sides are filled. Carefully remove the dough from mould.


4. Put moulded dough onto baking tray. Repeat until finish. Brush with eggwash.

5. Preheat oven at 170C. Bake for 20 mins turning the tray once or twice to get even browning.

6. Remove and cool completely before putting into boxes.

Note:
There are many ways you could decorate your heart-shaped pineapple tarts such as sparkles, imprints or even chocolate. I personally prefer my pineapple tarts original, hence, the plain eggwash.


Thank you for your dropping by to The Informal Chef. If you like what you have read and would like to SHARE this with your friends, kindly click on those little buttons available on top. I am also available in the following social medias:

FACEBOOK: www.facebook.com/theinformalchef
PINTEREST: https://www.pinterest.com/christineyong74/
BLOGGER: theinformalchef.blogspot.com

Add "like" in FACEBOOK, "follow" in PINTEREST, or add your email to my BLOGGER's e-mail or RSS feed to keep abreast with my latest postings.

Look forward to your comments. Cheers!